The joy of summer and autumn is the fresh foods that bless our table. It is only months later that we remember, and miss, those delicious tastes.
One popular method for being able to enjoy those tastes all year round, is the easy art of pressure canning.
What Is Pressure Canning
Pressure canning is the heating of food in glass jars to prevent it from spoiling. This allows you to enjoy food out of season, savoring the rich nutritional value as if it was fresh picked. While some people preserve foods using a hot water bath, this method is not safe for non-acidic foods.
Pressure canning allows you to enjoy the rich flavors of vegetables, fruits and even meats out of season. Have you had your fruit trees laden with the bounty of autumn dropping more fruit than you can possibly eat?

Has your garden ever gone wild with abundance, producing delicious vegetables which you know in the months to come you will remember fondly when you can no longer taste them?
Pressure canning is the means to preserve the richness of summer and autumn. Succulent flavors can now be enjoyed all year round, safely and easily.
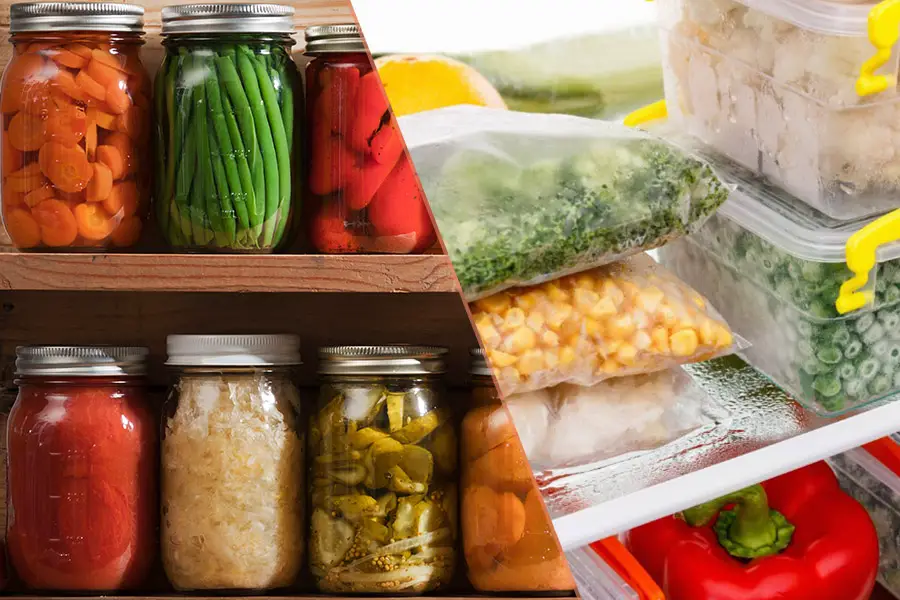
What Are The Different Types Of Canning
There are two types of canning: Water Bath Canning and Pressure Canning
The first type of canning uses a hot water bath. This method is great for preserving highly acidic foods such as tomatoes and fruits. This is the method used when making jams, sauces or chutneys.
The second type of canning is known as pressure canning. This method is suitable for preserving meats (both red and white), vegetables and other low acid foods. Heating the contents of the jars to 240°F eliminates the risk of foodborne sickness, allowing fresh delicious foods to be enjoyed all year round.
A Brief History Of Canning
The process of canning dates back to the time of Napoleon Bonaparte. Keen to make sure that his armies could be fed, he offered a prize of 12,000 francs to the person who could come up with an easy method for preserving food.

In 1810, Nicolas Appert won the prize after realizing that food did not spoil when cooked inside sealed jars. It was Louis Pasteur, half a century later, who would realize that food spoiled as a result of microbes.
Following the collapse of France at the end of the Napoleonic wars, the process of canning began to spread across Europe and the United States. The term canning itself, comes from the tin plated cans that were originally used to preserve the wide range of meats, vegetables and fruits held within.
It was during the First World War, that military commanders used canning as a means of providing high calorie food to millions of soldiers. Interestingly in 1917, the French and Italian armies began issuing canned cuisine foods, such as Beef Bourguignon and Ravioli, respectively to their troops.
Why Do People Pressure Can Their Food
Pressure canning is an ideal method for preventing foods from spoiling. This allows people to enjoy its full nutritional value; akin to that of fresh food, when a food is no longer in season. Pressure canning is excellent for keeping the nutritional value of food long term.
It also allows us to enjoy great flavors and to make the most of one’s seasonal bounties, all year round. I find the ability to gift a friend, family member, or even a random stranger, with a sample of home-made preserves can add real joy to another person’s day.
What Are The Benefits Of Pressure Canned Food
Pressure canned food has the benefit of being one of the quicker, more reliable, safer, cheaper and generally simpler methods for preserving just about any food.

We all know that foods are often cheaper when they are in season, and noticeably more expensive when they are not. Often the foods are not only more expensive out of season, but usually the quality is not as good.
Pressure canned food allows you to capture the quality and flavors of any season, so that you can enjoy them out of season. When you pressure can your food, you can be more certain of its quality, as you have control of this.
The use of reusable containers and not needing to transport food across the country, means that your food will also have less impact on the environment.
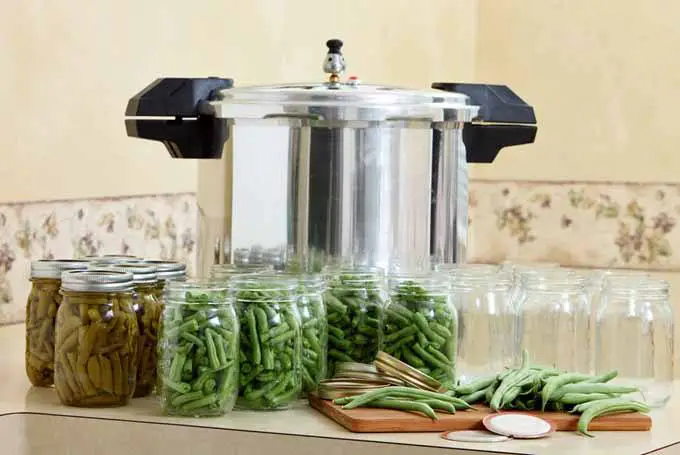
Some Of The Basic Equipment You Will Need
- Pressure canner
- Quart or pint -sized canning jars
- Canning lids and seals
- Tongs
- Jar lifter
- Long narrow spatula (for stirring the contents)
- Cloths and towels
- Oven mitts
How To Use A Pressure Canner
- Fill your pressure canner with the correct amount of water, as per, its instruction manual. Different canners will require different amounts of water. As a helpful little hint, if you live in an area with hard water, add a little bit of vinegar to your water to stop lime droplets forming on the outside of your jars.
- There may not seem to be much water in the bottom of your canner, however this will be adequate for your needs as the high temperature is caused by a buildup of steam pressure. The jars need not be covered, unlike with a hot water bath canner.
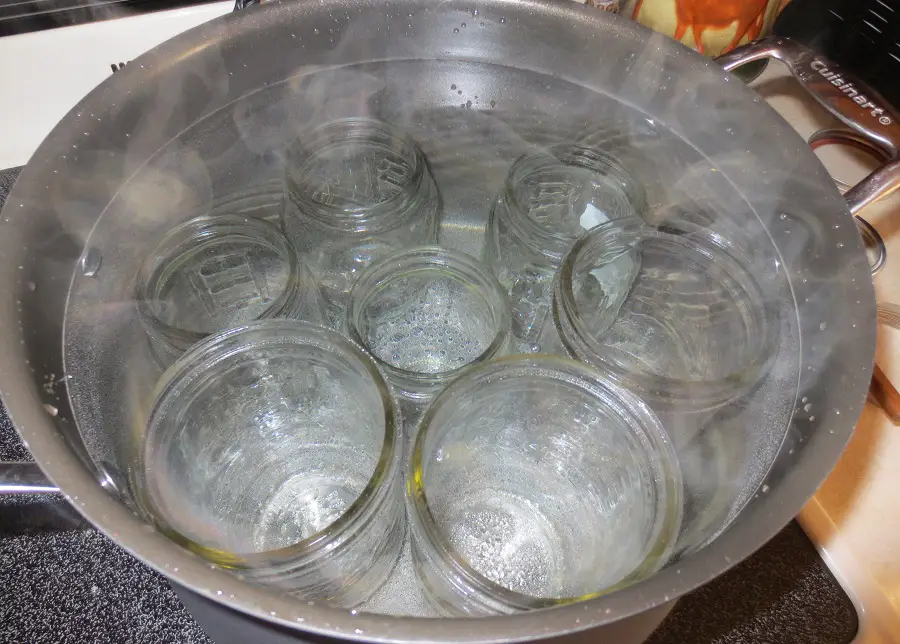
- Thoroughly clean and rinse your jars and lids. Your jars do not need to be sterilized, however they must be clean. Check your jars thoroughly, especially the rims, to make sure that there are no nicks or cracks. The slightest nick or crack can prevent your jars from sealing properly, resulting in the food not being preserved.

- Make sure that the jars and seals are kept hot until you ready to fill the jars. One way to do this is to wash the jars in the dishwasher, and then when finished, keep them in there with the door closed. When you’re ready to use the jars, simply remove a few at a time, closing the door after you. You can also use a warm oven instead. It is important not to mix hot and cold items as this can increase the risk of the glass jars shattering.
- Warm the lids BUT do not boil or overheat the lids as you risk damaging their seals.
- Prepare the food you intend to preserve, using your favorite preserving recipe.
- Fill each jar with your food preserve, making sure that you leave a small gap (about 1 inch) at the top of each jar.
- Remove air bubbles from your food preserve, by stirring it gently with a wooden, rubber or plastic stirrer. Never use a metal stirrer.
- Clean the outside rim of the jar using either a dry cloth or tea towel. This is especially important, as you want to get a good seal.
- Place the seals and rings on the jars. Tighten them but don’t tighten them too much.

- Place the jars on the rack in your pressure canner, making sure that the jars are not sitting on the bottom of the actual canner. If you do not have a rack for your pressure canner you can use a small metal baking tray, as long as it fits inside comfortably.
- Secure the lid on the canner and heat to boiling. Make sure to vent your canner for 10 minutes to remove the air inside. Different canners will have different instructions on how to use them and get them up to pressure. Make sure you follow the manufacturer’s instructions.
- Once your canner is at the correct pressure, according to your recipe, maintain this pressure for the required amount of time. If the pressure falls below the minimum level you will need to start your timing over again.
- The pressure for your pressure canner will be determined by the altitude that you live at. For altitudes of 0 to 2,000 feet use 11 psi. For altitudes of 2,001 to 4,000 feet use 12 psi. For altitudes of 4,001 to 6,000 feet use 13 psi. For altitudes of 6,001 to 8,000 feet use 14 psi.

- When the time is up, you can turn the heat off and let it cool down slowly and naturally. While it may be tempting to deliberately release some of the pressure, or to cool it down using cold cloths or water, it is important that you resist temptation.
- Do not be in a rush to remove your jars from the pressure canner. When the pressure canner has cooled down and the pressure has dropped to zero, you may carefully remove the lid of the pressure canner. CAUTION: The contents may still be very hot and steamy. Be sensible so that you do not burn yourself.
- Using a jar lifter or some other similar utensil, take the jars out of the canner and place them on a board or thick towel to cool down. Leave a couple of inches between each jar, making sure they are not in a draughty area.
- Leave the jars to cool for twelve hours. Do NOT be tempted to touch or push the lids of the jars. While it may be tempting to play with the lids of the jars, it is important to leave them free to cool naturally. Do not retighten the lids, unless using a brand that specifically requires you to do so.
- Twelve hours later, check to make sure that the lids have been pulled down tight. If the lids can go up and down, the jars did not seal properly and you will not be able to store these long-term.
Looking After Your Pressure Canned Food
- Store in a clean dry place where the room temperature is between 50°F and 70°F.
- Keep moving older foods to the front of your shelves so that oldest foods are used first.
- While many foods can be easily preserved for years, they will start to lose flavor and nutritional value over time.
- Never use food if the lids are loose or bulging, leaking or there is an unusual smell.

Manufacturers
There are several manufacturers of pressure canners available on the market. Four of the more common pressure canners are made by Presto, All American, T-Fal and Granite Ware.
Presto was started in 1905 making industrial sized pressure canners. Their pressure canners are able to be used for both pressure canning and also for boiling water canning.
All American products have been manufactured since 1930. All American pressure cooker/canners have a unique “metal-to-metal” sealing system meaning that no replaceable seal is required.
T-Fal began as a maker of nonstick Teflon pans. They have now grown to produce a wide range of kitchen products, including pressure cookers.
Granite Ware prides itself on making American cookware since 1871. All Granite Ware’s pressure canners come with steamer inserts to put your canning jars in and has a pressure regulator set for three different levels.
Some Recipes To Get You Started
Here’s some of our recommendation and recipese how to get started:
Green Beans
What You Will Need
- Pressure canner and equipment as outlined above
- Green beans
- Canning salt
- boiling water

Instructions
- Prepare your pressure canner as outlined in the instructions above.
- Cut the ends off the pole beans.
- Clean the beans thoroughly in cold water. This is especially important, as you’d be surprised at how much dirt and dust gets washed off.
- After washing the beans, drain them properly in order to get them ready for putting in the jars.
- Pack the beans into each jar and add one teaspoon of salt to every jar.
- Make sure to pack the beans in tightly, leaving one inch of clear space at the top of each jar.
- Fill the jar with boiling water, making sure to still keep the one-inch of space free at the top.
- Wipe the rim of the jars and put on the two-piece lid. Tighten snugly but don’t over tighten.
- Place the jars of beans in the pressure canner and seal the lid on the pressure canner.
- Heat the pressure canner to raise its pressure. Maintain the pressure of the pressure canner at 11 psi (for altitudes of 0 to 2,000 feet) for 20 minutes if using pint-sized jars or 25 minutes if using quarts-sized jars. See the instructions above if you live at altitudes greater than 2,000 feet.

- CAUTION: If at any time the pressure should drop below the required level, you will need to restart your timer.
- When your glass jars, with the beans inside, have been sterilized, turn the pressure canner off and cool down as outlined in the instructions above.
- NOTE: If you have used purple beans, they will have changed to a greenish color. This is perfectly normal.
- Store your jars of beans in a cool dark place. Enjoy.
Carrots
What You Will Need
- Pressure canner and equipment as outlined above
- Carrots
- Canning salt (optional)
- boiling water

Instructions
- Prepare the pressure canner and the glass jars as outlined in the instructions above.
- Wash and peel your carrots. You can cut your carrots into slices if you want or alternatively you can leave them whole. You may need to cut them in order to make sure they fit into the jar.
- Give your carrots another thorough washing.
- Put your carrots into your hot glass jars making sure to leave one inch of headspace free at the top of each jar. Make sure the carrots are packed in tightly. As an optional extra you can add half a teaspoon of salt to each pint jar or one teaspoon of salt quart sized jars.
- Put boiling water in the glass jars making sure to leave one inch free of headspace at the top of the glass jars.
- Gently use a narrow thin spatula to remove any trapped air bubbles. It is important not to use a metal object when doing this. Remember that the purpose is to remove air from the jar and not to mash your carrots.
- Wipe the rim of the jars and put on the two-piece lid. Tighten snugly but don’t over tighten.
- Place the jars of carrots on the rack in the pressure canner and seal the lid of the pressure canner.
- Heat the pressure canner to raise its pressure. Maintain the pressure of the pressure canner at 11 psi (for altitudes of 0 to 2,000 feet) for 25 minutes if using pint-sized jars, or 30 minutes if using quarts-sized jars. See the instructions above if you live at altitudes greater than 2,000 feet.

- CAUTION: If at any time the pressure should drop below the required level, you will need to restart your timer.
- When the time is up, turn the pressure canner off and cool down as outlined in the instructions above.
- Make sure to label your jars with the name and date of your carrots.
- Store your jars of carrots in a cool dark place.
Potatoes
One of the things I like about pressure canning potatoes, is that the process of preserving them is similar to what you would do if preparing potatoes for cooking. In the winter months, this can then save you time when cooking meals as the potatoes are pre-prepared for you.
What You Will Need
- Pressure canner and equipment as outlined above
- Potatoes
- Canning salt (optional)
- Boiling water
- Pot for cooking potatoes

Instructions
- Prepare the pressure canner and the glass jars as outlined in the instructions above.
- Wash and peel your potatoes. If you are using baby potatoes you can leave them whole, otherwise cut your potatoes into pieces or slices.
- Gently boil your potatoes for a short amount of time. About ten minutes for baby potatoes, otherwise for five minutes.
- Thoroughly drain the potatoes.
- Put the hot potatoes or potato pieces into your hot jars making sure to leave one inch of headspace at the top of the glass jar.
- Add 1 teaspoon of salt to each quart sized jar (half a teaspoon of salt if using pint-sized jars) and fill with fresh boiling water, making sure to leave 1 inch of headspace at the top of the jar.
- Gently use a narrow thin spatula to remove any trapped air bubbles. It is important not to use a metal object when doing this. Remember that the purpose is to remove air from the jar and not to mash your potatoes.
- Wipe the rim of the jars and put on the two-piece lid. Tighten snugly but don’t over tighten.
- Place the jars of potatoes on the rack in the pressure canner and seal the lid of the pressure canner.
- Heat the pressure canner to raise its pressure. Maintain the pressure of the pressure canner at 11 psi (for altitudes of 0 to 2,000 feet) for 35 minutes if using pint-sized jars, or 40 minutes if using quarts-sized jars. See the instructions above if you live at altitudes greater than 2,000 feet.

- CAUTION: If at any time the pressure should drop below the required level, you will need to restart your timer.
- When the time is up, turn the pressure canner off and cool down as outlined in the instructions above.
- Make sure to label your jars with the name and date of your potatoes.
- Store your jars of potatoes in a cool dark place for up to 12 months.
- When ready to serve the potatoes, open the jar and drain all of the liquid from it. Your pressure canned potatoes will need to be heated in a pan for 5 to 10 minutes or baked in the oven. Make sure that your pressure canned potatoes are fully heated. Your potatoes can then be enjoyed mashed, fried, baked, roasted or however you like. Enjoy!
Conclusion
As we can see, pressure canning is an easy way to enjoy the delicious tastes of summer and autumn all year round. There are plenty of easy recipes available online for most of the foods that you will want to pressure can. Why don’t you give pressure canning a try? Your taste buds will thank you for it.
Resources:
Pingback: Pressure Canning Altitude Chart | PressureCanners.com
Pingback: The Secret to Canning Pickles | PressureCanners.com