Pressure canners can seem intimidating at first with the dials, rocking noise, and high-pressure steam building up in a pot. Someone inevitably has a story of how their aunt or grandma had a pressure canner pop its lid, which resulted in a hole in the ceiling. I am here to explain the science behind pressure canners and to assure you that it is a safe and easy way to preserve food.
So exactly how do pressure canners work?
It is true that pressure canners build up pressure in order to cook and seal your canning jars. It’s also true that if you let the pressure build up in the canner, it can become a little dangerous. Today’s pressure canners are safer and easier to operate than the ones your grandma used, and as long as you understand how it works and follow some simple directions, pressure canning can be quite fun and fruitful.
Table of Contents
The Science Behind Pressure Canners
Pressure canners work by trapping steam and building pressure inside a pot. Pressure canners come in several varieties. Some have a gasket and screw top lid, and some have lids with an automatic vent or cover lock. All have a vent pipe to release excess steam.
Pressure canners hold pressure up to 25 pounds and most recipes call for 5 to 15 pounds of pressure, but what does that mean? The amount of pressure corresponds to temperature. Water boils at 212 degrees F (100 degrees C) at sea level. At higher altitudes, the boiling temperature of the water is lower.
For example, at 5,000 feet (1.52 kilometers) above sea level, water boils at 203 degrees F (95 degrees C). This is due to atmospheric pressure. Water boils when the atmospheric pressure equals the point of pressure when water turns to steam.
Pressure canners build up more pressure to compensate for the pressure in the atmosphere. This results in higher temperatures inside the canner. For more information, check out the Pressure Canning Altitude Chart.
Why Does This Matter?
Foods need to be processed at a high temperature for a specific amount of time to ensure they are preserved safely. A pressure canner builds up pressure and heat required for sterilization. By adjusting the temperature on the stove and observing the gauges, you can keep the temperature and pressure inside the canner at a steady level. This will kill the bacteria that may lead to spoilage.
It’s important to look in your pressure canner’s manual and guidelines from experts to determine the proper canning time and pressure. 10 pounds is often recommended as a baseline for those that live below 1,000 feet in altitude, but 15 pounds is the norm over that.
Those who live in the mountains often know their altitude, but others might not have thought about it before. You can type in your address at this site to check your elevation.
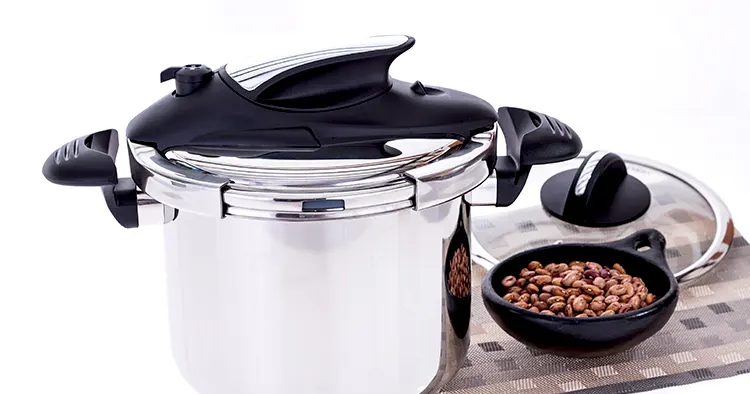
Can I Use a Pressure Cooker to Can Food?
The short answer is no.
Pressure cookers cook foods rapidly through a build-up of pressure, much the same way a pressure canner does, but pressure cookers are smaller and thus cannot build the higher pressure required for canning. While some pressure cookers have a gauge similar to a pressure canner, they lack the regulation to keep the pressure and temperature steady. They also lack the ability to cool the jars down slowly, and this is required for a proper seal.
Make sure your appliance says that it is specifically designed for canning. Here is a great comparison of the best pressure canners for beginners.
Gasket vs Gasket-less Canners
There are often two types of pressure canners – those with a gasket seal and those without. They perform the same.
Pressure Canners with Gasket Seal
Pressure canners with a rubber gasket will generally have a lid that is placed on and then twisted to create a vacuum seal between the gasket and the metal lid of the canner. Before placing the lid on the canner, check that the gasket is evenly set in the lid and has no cracks. It should be replaced when it gets worn.
Pressure Canners without Gasket Seal, Gasket-less
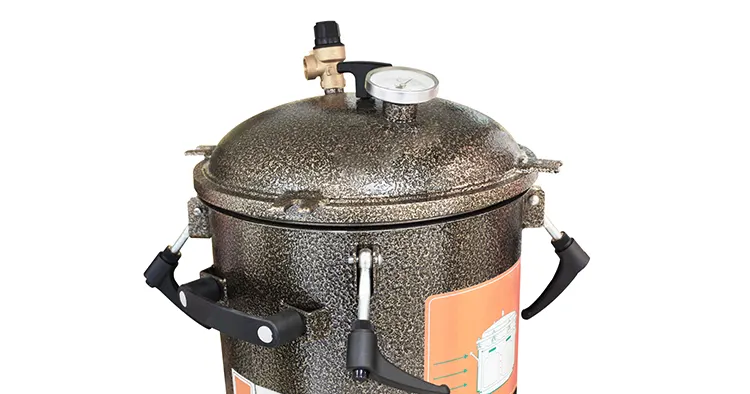
Pressure canners without a rubber gasket will often have screws on top. Placing the lid on the canner base in the proper position and then tightening the screws will pressure the two pieces of metal together forming a seal. It is recommended that you smear a drop of olive oil on the contact point periodically to ensure a good seal.
Types of Pressure Canner Regulators
When shopping for a pressure canner, you will encounter 3 different types of pressure regulators.
One-Piece Pressure Regulators
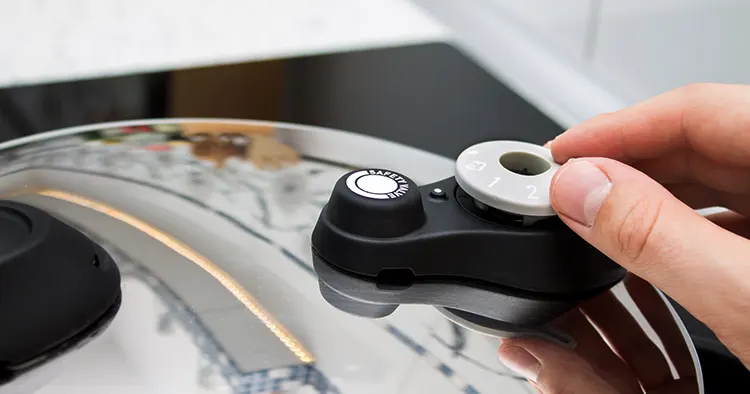
One-Piece Pressure Regulators are often a round piece with three numbers (5, 10, 15). This is placed on the steam valve. Depending on which number is placed on top of the valve will determine the pressure. Adjusting the heat source up or down will cause the regulator to rock back and forth and release small amounts of steam.
Weighted-Gauge Pressure Regulators
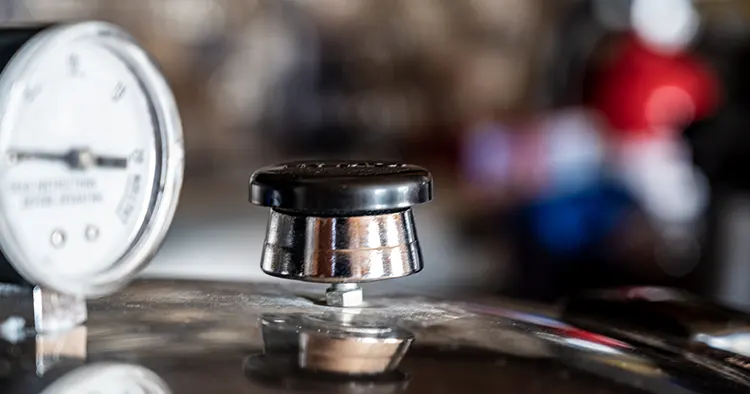
Weighted-Gauge Pressure Regulators have a piece that sits on top of the steam valve as well. Weights are added to the regulator to adjust the pressure. Often the regulator alone is for 5 pounds and then you can add one or two 5-pound weights. You adjust the heat source to create a steady rocking sound. Steam is released slowly through the valve as it jiggles.
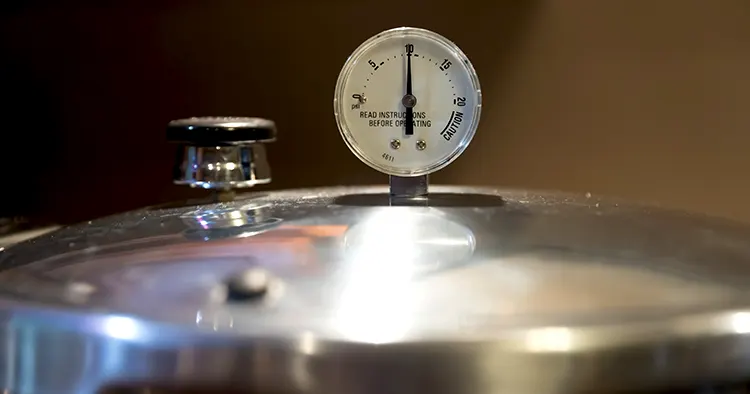
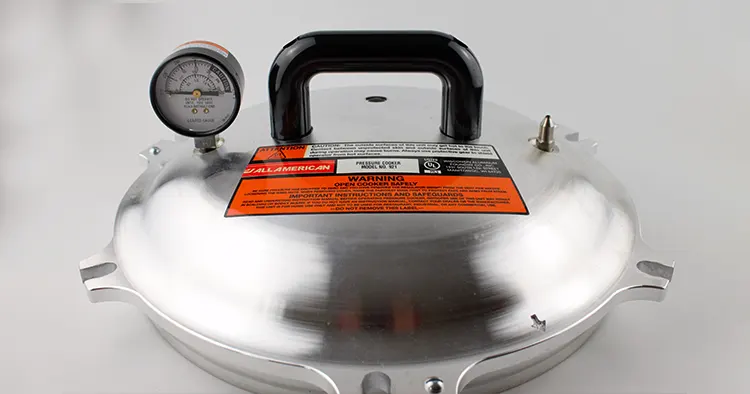
Dial-Gauge Regulators
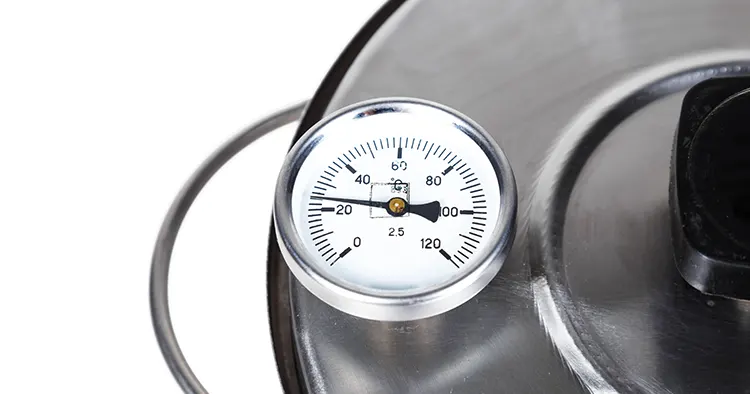
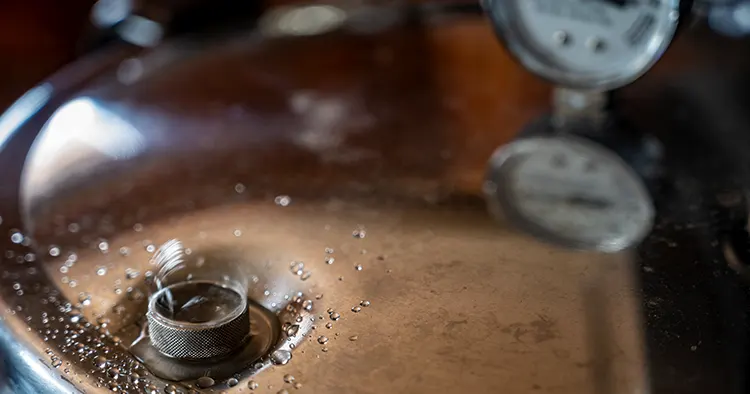
Dial-Gauge Regulators have a dial face that shows the exact pressure inside of the canner. There is still a piece over the vent that will rock, but you need to read the gauge to see if the pressure is correct. These are more accurate than the other regulators, but it is recommended that the dials be inspected annually to check their precision.
How do I prepare my pressure canner?
Each time you use your pressure canner, you should do a quick check of the components.
- Make sure that you have all of the weights and pieces before you start.
- If your canner can a gasket, make sure it is not worn.
- If your canner does not have a gasket, a small amount of olive oil wiped on where the lid contacts the pot ensures a good seal.
- With the regulator removed, check the steam valve to make sure it doesn’t have a piece of debris in the hole. You should be able to see through it. A pin can be used to clear the hole.
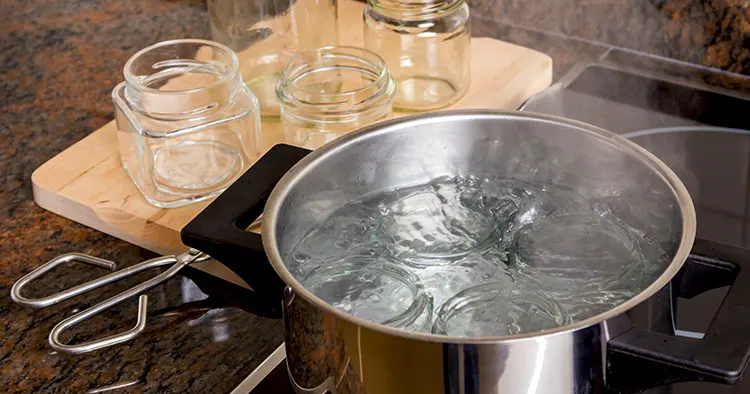
Place the pressure canner on the stove and add water. The amount of water depends on the model of pressure canner, so read your instructions. Most require at least 2-3 inches (5-8 centimeters) to start. When you add the jars, the water level will rise.
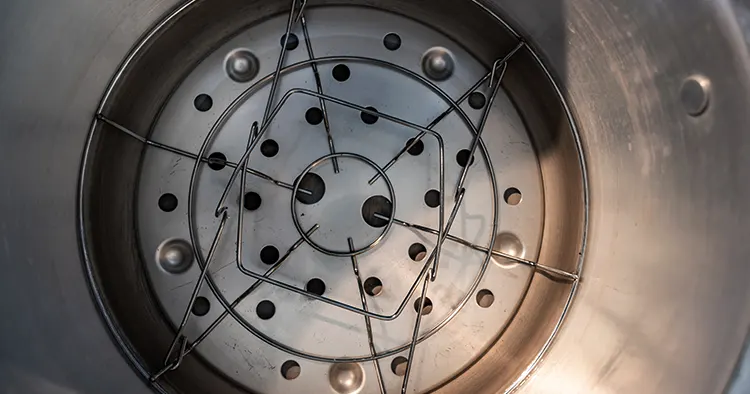
If your pressure canner comes with a trivet, place it on the bottom of the canner at this time. The trivet is designed to keep your jars from sitting on the bottom of the canner where they have a chance of breaking.
Heat up the water. Generally, you want the temperature of the filled jars to be pretty close to the temperature of the water in the canner. If you are using a raw-pack method with your food, heat the canner to around 140 degrees F (~60 ℃), really hot. If you are using the hot-pack method, heat the water to around 180 degrees F (~62 ℃), simmering. This is not an exact science, but it should not be at a rolling boil.
Loading Your Pressure Canner
Once your jars are added to the canner, add more water, or remove some, depending on your pressure canner instructions. Too little water will cause your canner to boil dry, but too much water will not allow your canner to build up the proper amount of steam.
If you have a tall canner that allows two layers of jars, check your manual on how to properly load your jars using a spacer trivet and make sure your jars are not stacked in the straight line vertically. This affects how the steam can circulate throughout the canner.
Building Up Steam
Seal the lid according to your manual instructions and turn up the heat. At this point, your steam valve is open. The water will come to a boil and steam will start to rise out of the valve. This may take 10-15 minutes depending on contents and heat source. Once you see steam, allow it to release in this manner for 10 minutes.
If using weighted or one-piece gauges, you can now place your regulator on top, keeping in mind the pounds of pressure needed. After a period of time, the pressure will seal, and the regulator will start to rock. Adjust the heat source until it is rocking steadily and then start your processing timer.
If using a dial-gauge, place the piece over the steam valve and pay attention to the dial. Once the dial reaches the desired level, the steam valve piece will be rocking steadily. Adjust the heat source if the pressure becomes too high or low. At some point, it settles, and then you can start your processing timer.
After Processing
Once the processing time has elapsed, turn off the heat source. Do not move the pressure canner. If you have a dial-gauge, wait until the pressure has hit the zero mark. If you are using a weighted gauge, let it sit until there is no more pressure and the pressure canner has cooled down completely. This will take a while – leave it overnight to be safe. At this point, release the vent to be sure the pressure is completely gone. Any residual pressure can be dangerous.
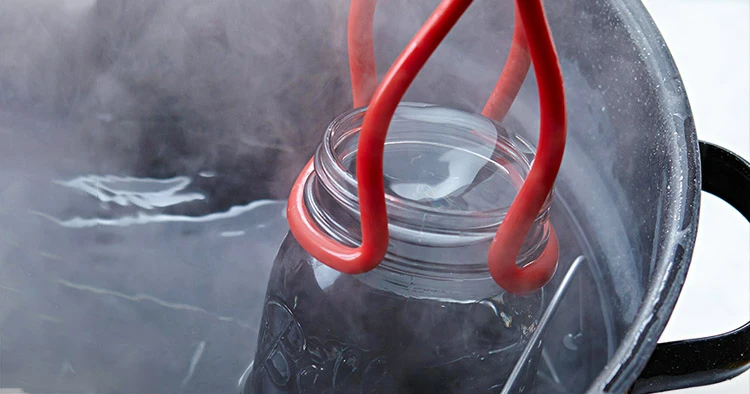
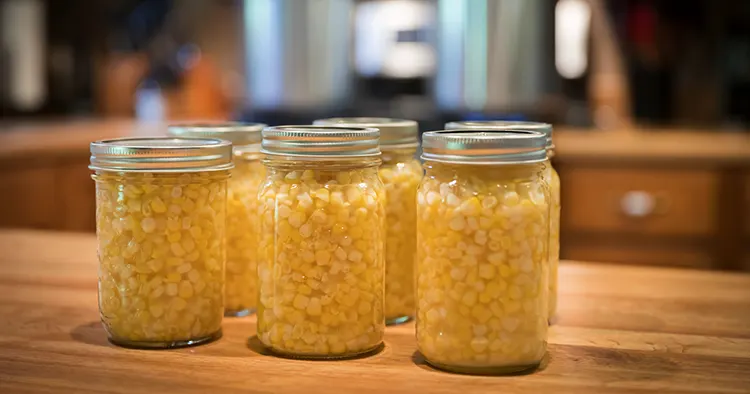
Release the lid and remove the jars onto a towel on the counter using a jar lifter. Depending on how long you let your jars sit in the canner, they might still be very hot so use caution. Once the jars are completely cool, remove the rings and check the seals before storing them in a cool, dry place.
Troubleshooting Tips
If you remove your jars and find that there is a low amount of liquid, this is called siphoning and could mean a few things:
- Your food has absorbed more of the water. This often happens when canning beans.
- You did not leave enough headspace in your jars when you filled them. The liquid in the jars bubbled up and leaked out the lid. If the lids sealed after the liquid escaped, you should be fine. Unless more than half of the liquid is gone, the food is considered safe, although it might not look as pretty.
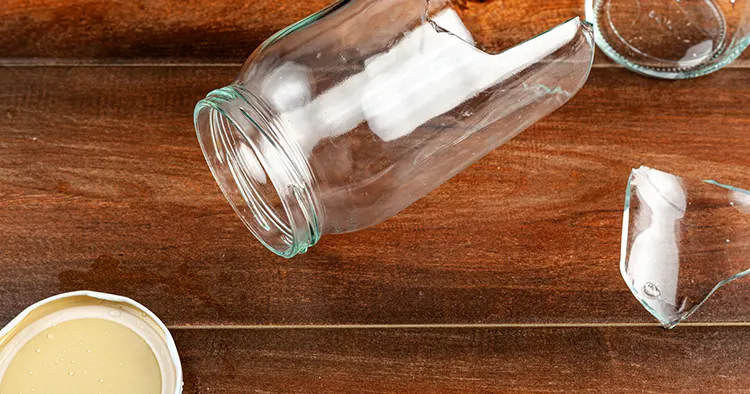
If your jars broke in the canner, this may be caused by:
- The quality of the jar. Always buy good quality jars and inspect them jars for cracks before using.
- The temperature change when filling or placing the jars in the canner. Make sure your canner temperature and jar temperature are even.
- The jars rattling on the bottom of the canner. Use a trivet in the bottom of the canner to prevent thermal shock.
Ready to Pressure Can?
Now that you’ve answered the question of how do pressure canners work, you can have confidence in your abilities to pressure can a variety of foods. Pressure canning is the safest way to can meats and low acidity foods. It kills bacteria, sterilizes the food and jars, and seals it up for long-term storage.
Understanding pressure, following proper procedures, and exercising a little caution is essential. Once you’ve done a batch or two, you will be hooked.
If you are new to pressure canning, tell us how your first batch went. If you are experienced, share your tips and tricks with the newbies.